The second in an occasional series about nature and wildlife photography. All photos © Martin Harvey.
The subjects of Martin Harvey’s photography are as varied as the African continent itself. But the South Africa-based photographer maintains one constant in all of his shots: good composition.
We caught up with the frequent WWF photography contributor in between assignments last month to talk about what makes a good wildlife composition.

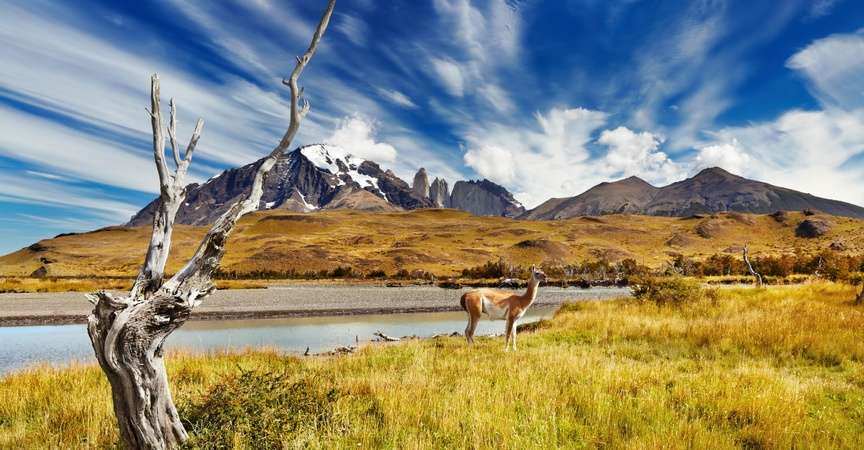
Though the horizon cuts through the middle of the photo, the gemsbok – the center of your attention – is in the bottom third, demonstrating the value of the “rule of thirds.”
In general, what are your “golden rules” for composing wildlife photos?
As a general principle, the “rule of thirds” really is worth following. You don’t have to always follow this, but there is no doubt that pictures divided into thirds are more pleasing to the eye.
Another rule is fit the whole animal into the frame. Photos of animals without legs or ears don’t really work well! Having said that, a good, tight crop on the face of an animal is always a good option.
Wildlife photographers often focus on an animal’s eyes (if you’re close enough to capture them). Why is that so important?
As with photographing a person, the eyes are, to use the old cliché, “the window to the soul.” An animal’s eyes are where we connect with the animal. They reveal much about its character. So, yes, whenever photographing an animal close up, it is important to focus on the eyes.

“You can see that the gorilla is making direct eye contact with the camera, and your eyes are immediately drawn to this,” Harvey says.
How do you make a compelling photo of a large mass of animals – cliffs covered in hundreds of birds, for example?
A large mass of animals is always a challenge, because it is difficult not to cut off parts. As a general rule, I try to fill the frame. Another possibility is a slow shutter speed to show movement or motion blur. In the case of the flamingo picture (above), I used a long lens to fill the frame with birds. And then to make it a little bit more interesting, I used a long shutter speed to show movement.

A long shutter speed allowed Harvey to show movement among this large flock of flamingos.
What tips can you provide for shooting wildlife on the move?
You really have two options here. One is to try and freeze the movement. For this you preferably want a shutter speed of 1/1000 of a second or more.
If you don’t have enough light or if you want a more artistic look, then your second option would be to try and introduce some motion blur by using a slow shutter speed of about 1/60 of a second or less. For this you really need your camera to be on some sort of support like a tripod. Any up-and-down movement if you are holding the camera in your hands tends to make the image look merely out of focus as opposed to artistic.

Harvey used a slow shutter speed to create motion blur and thus the sensation of the cheetah’s speed.
When you are shooting wildlife, how do you personally determine the animal’s “comfort zone?”
I suppose that usually an animal lets you know either by moving off or looking uncomfortable or even sometimes responding aggressively. I think that everybody should be conscious of causing disturbance to an animal. In the case of the hippo (above), you can clearly see that this animal is not comfortable with my presence.

As soon as Harvey noticed this hippo’s body language telling him to move away, he immediately did.
View WWF photo galleries of destinations around the world.
See Martin Harvey’s nature photography.
Read the first installment in the Behind the Lens series.


